Easily Create URL Redirects using Azure Front Door
Many DNS hosting providers offer URL redirect capabilities out of the box, but if your provider doesn't it is still possible, there's just a few extra hoops you have to jump through. Azure Front Door provides a simple way of solving this problem.
I frequently use this during SSO integrations to create a shortened, easy to remember sign in URL, especially in instances when the Service Provider only offers Identity Provider (IdP) initiated sign on.
Instructions
-
Log into https://portal.azure.com, and search for Azure Front Door.
-
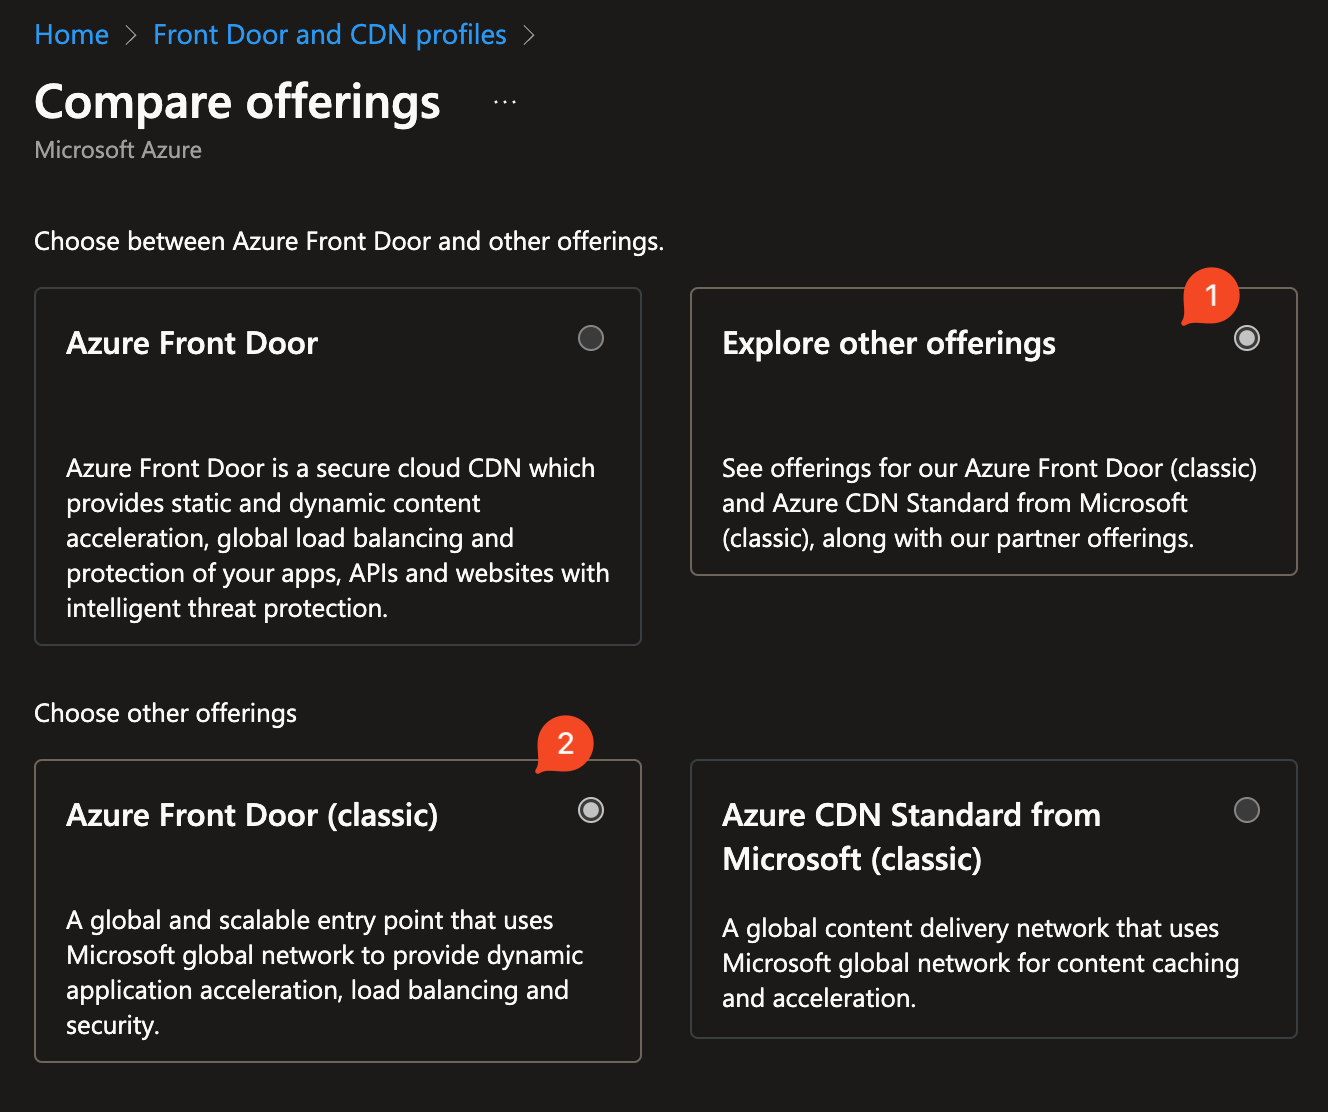
Hit Create, and select Explore other offerings, Azure Front Door (Classic) should be selected. Hit continue -
-
Assign to the correct subscription & resource group, mine sits in the same RG as the DNS zones.
-
Hit next to move into the Configuration tab.
-
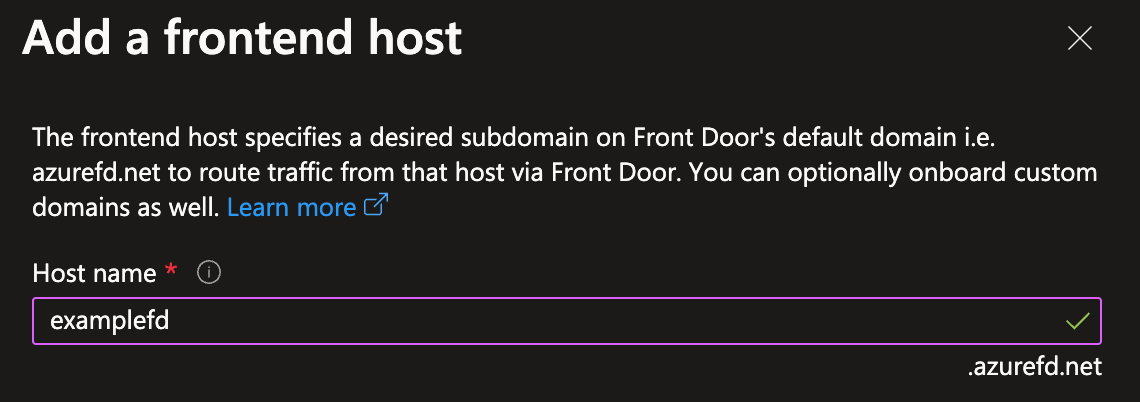
Hit the + sign on Frontends/Domains and give your frontend an appropriate name. You will use this later during DNS redirection -
-
Hit Add and move onto backend pools.
-
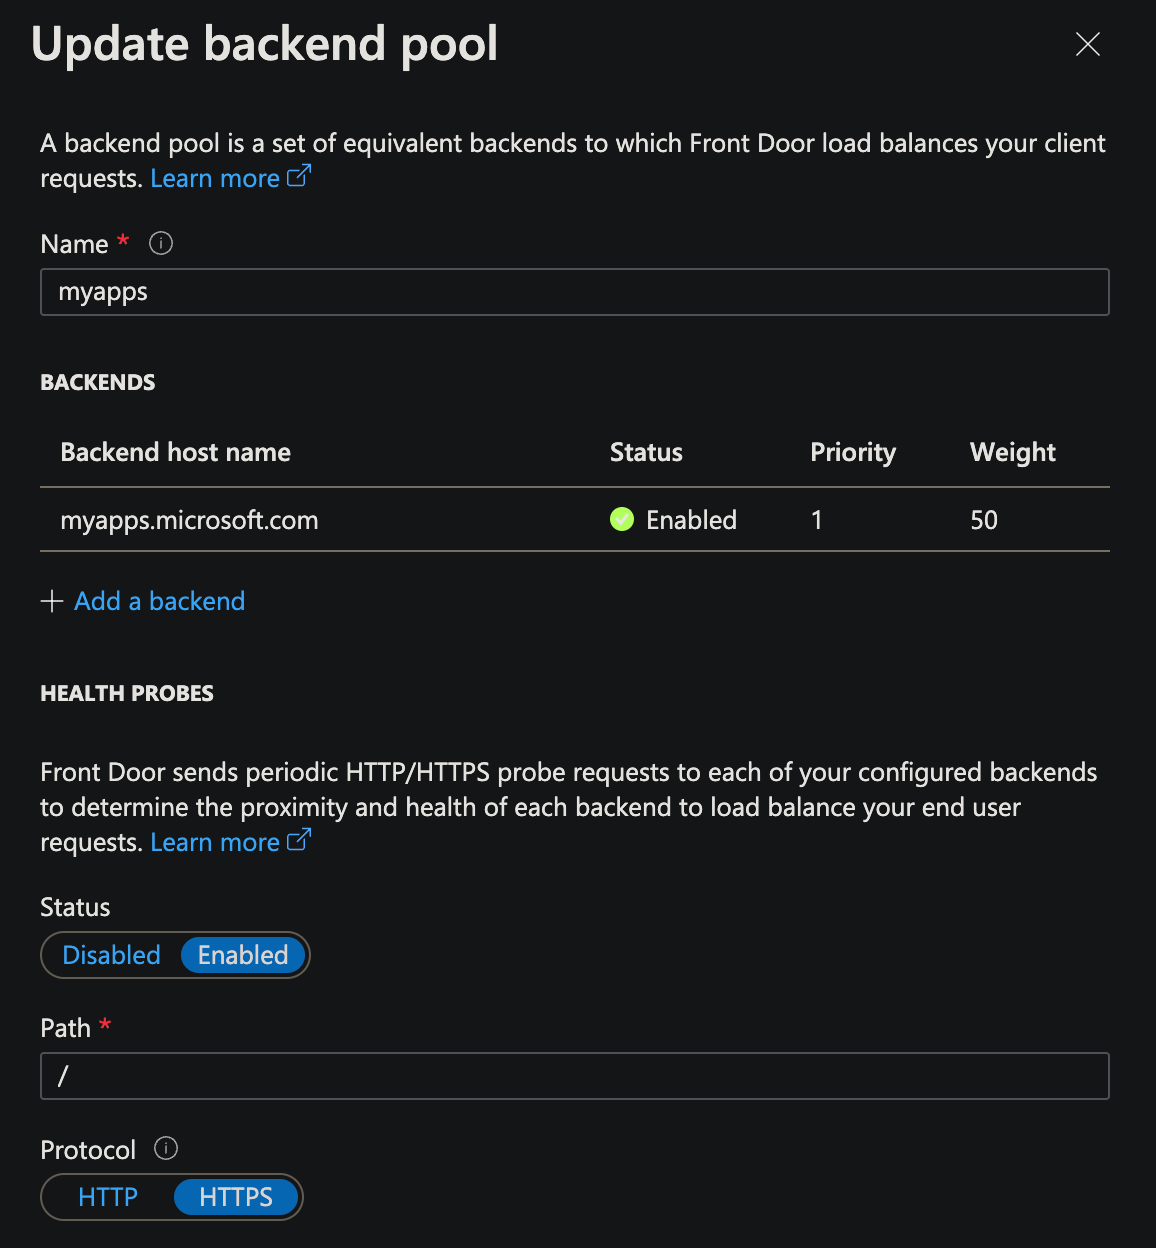
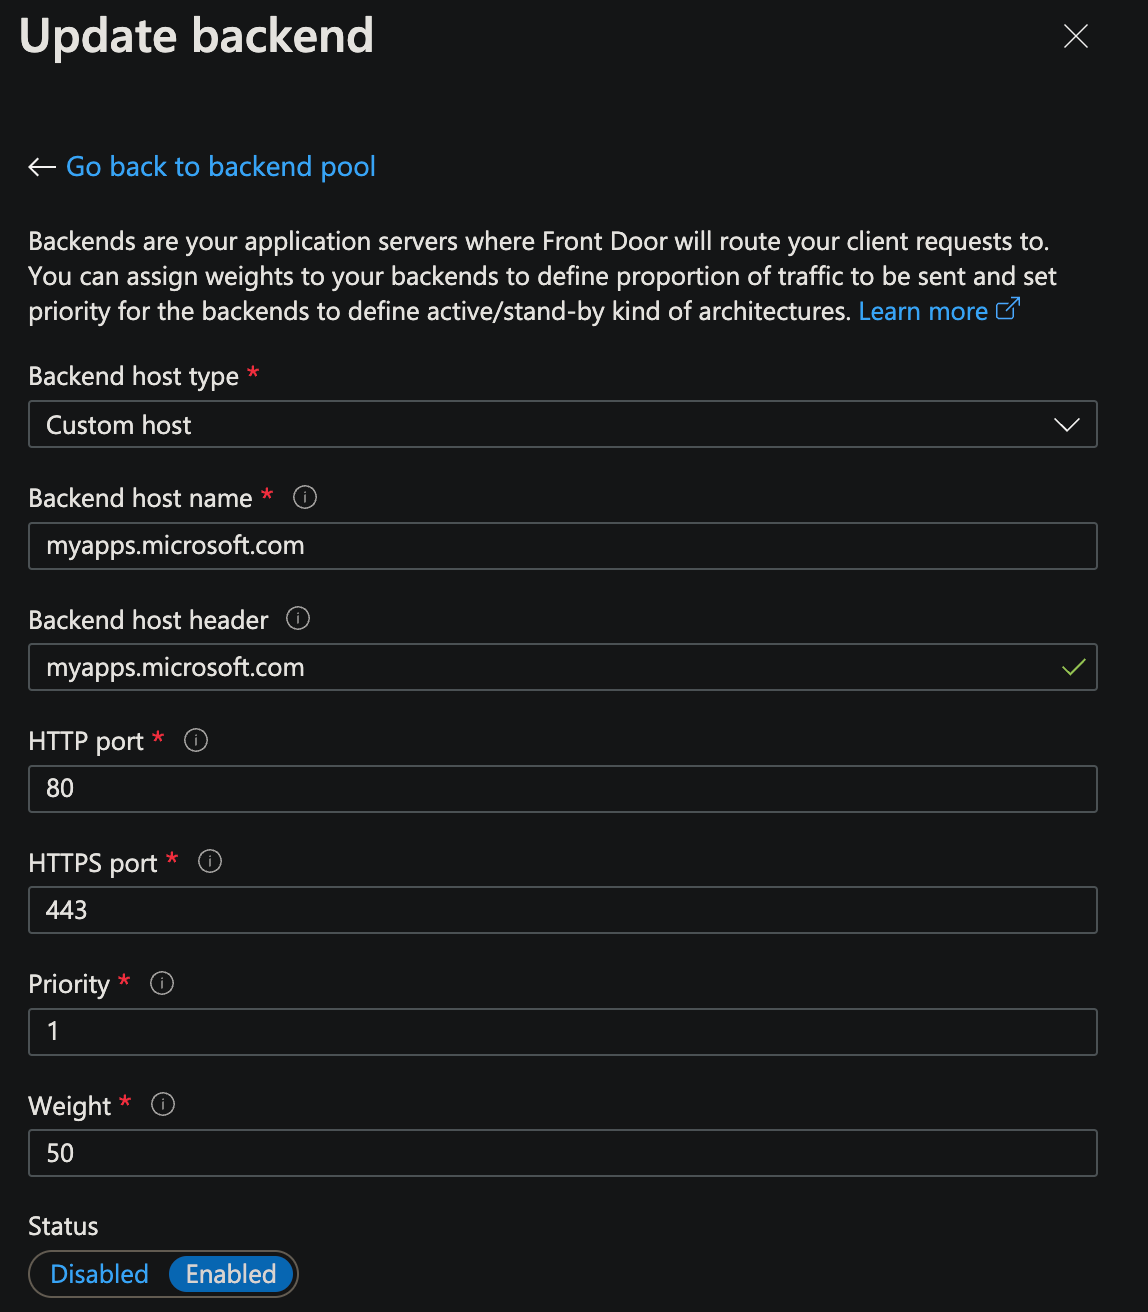
In my case I have the backend pool configured to point to myapps.microsoft.com -
-
Hit save and move to routing rules.
-
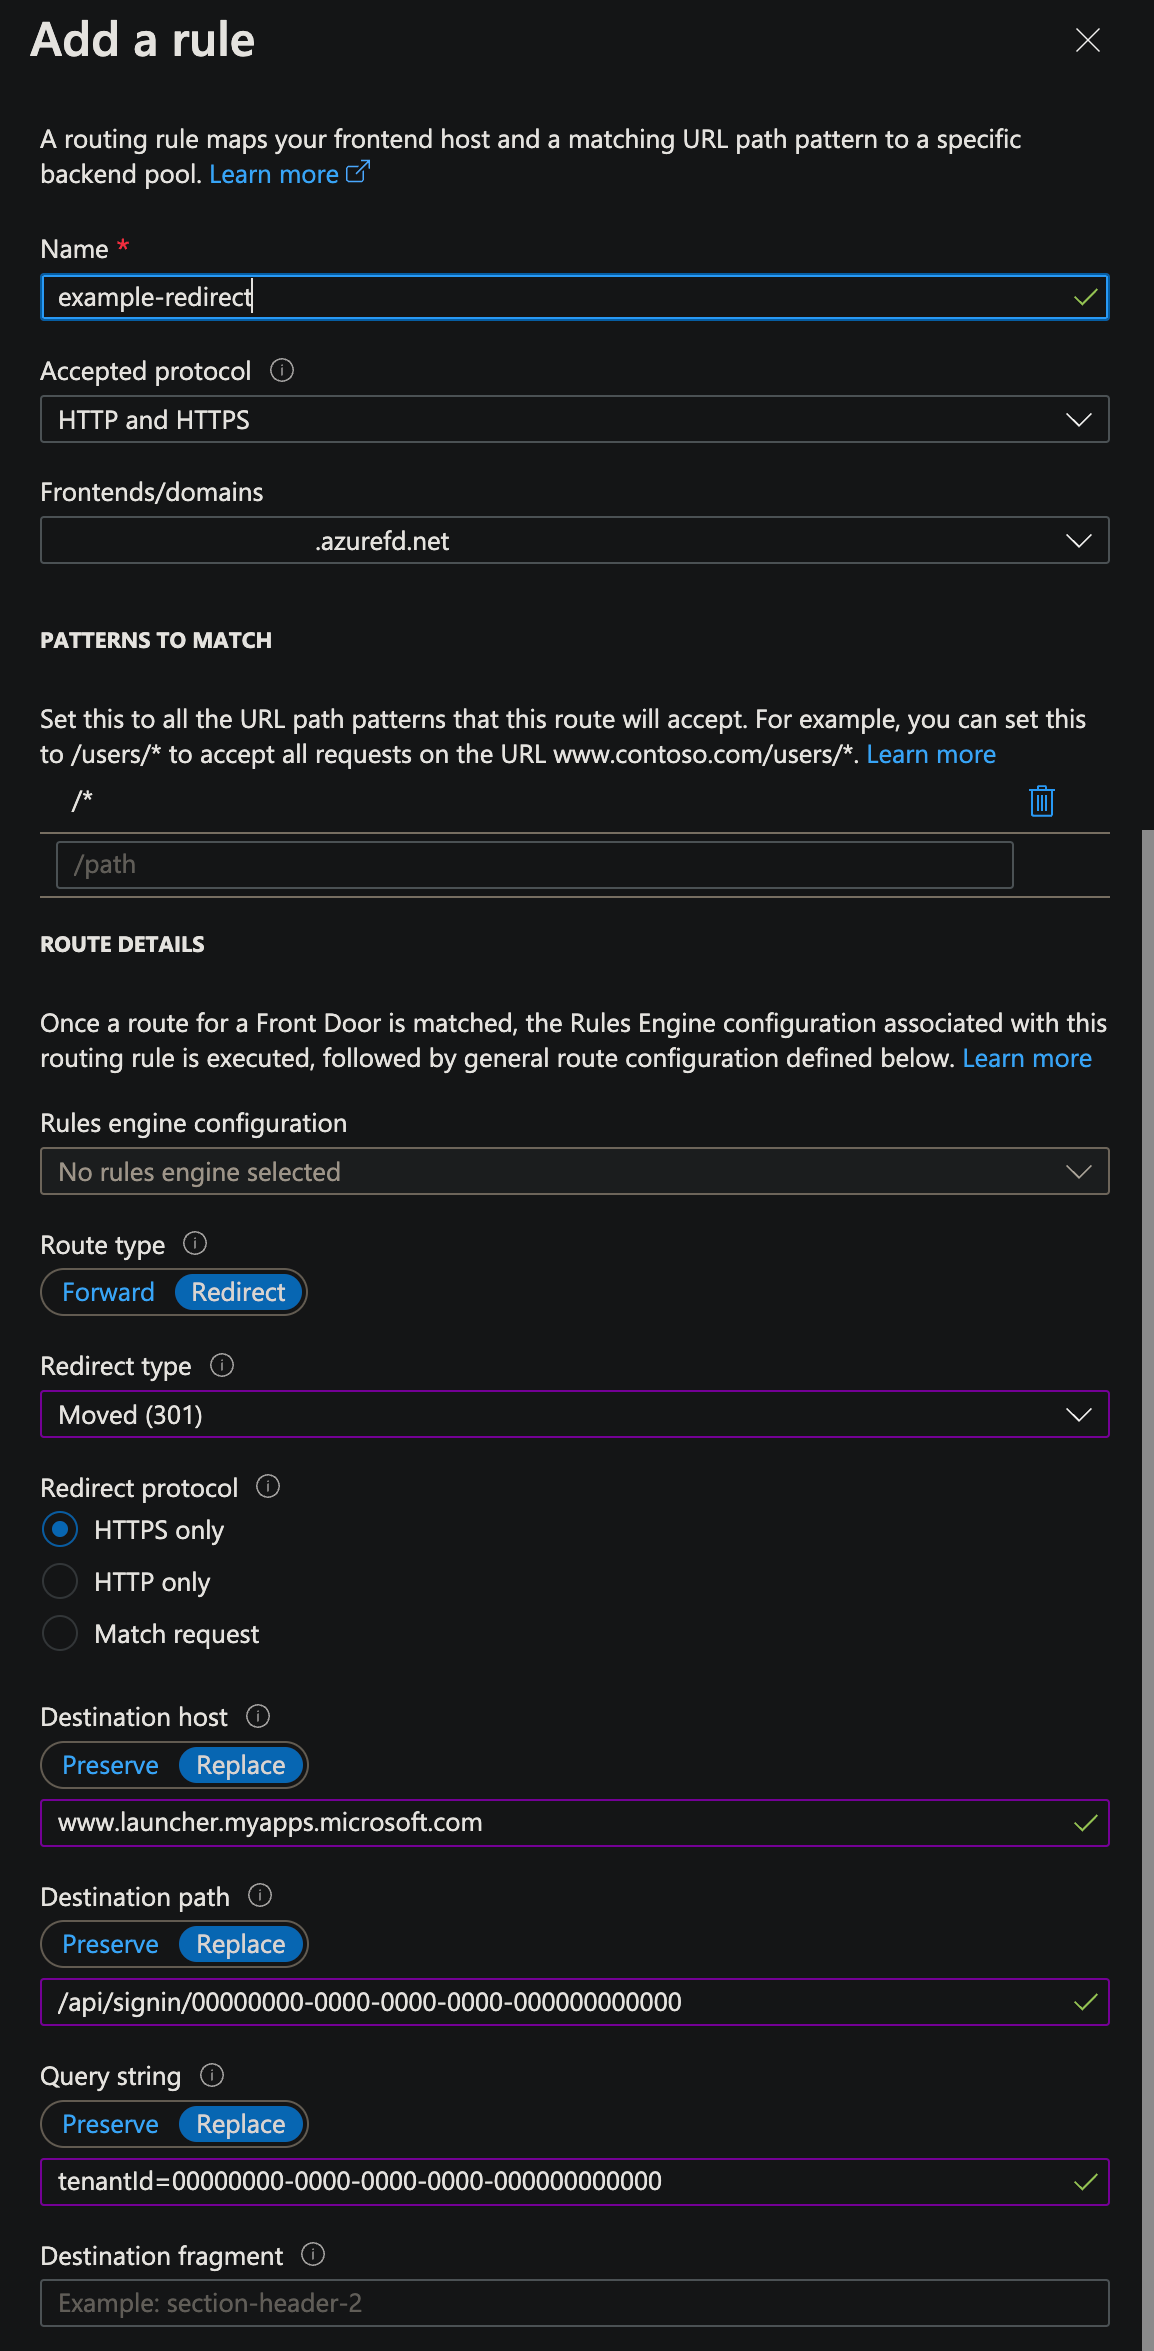
Here you can add your first redirect rule. It won't be active using your custom domain yet but it will give you and idea of how the rules work. In this example, I will be using a Microsoft Entra SAML SSO sign on url 'https://launcher.myapps.microsoft.com/api/signin/00000000-0000-0000-0000-000000000000?tenantId=00000000-0000-0000-0000-000000000000' -
-
Hit Add, and then Review + Create. Create the resource.
-
Once creation has completed, open the Front Door and select Front Door Designer. Here you'll see the configuration you just completed.
-
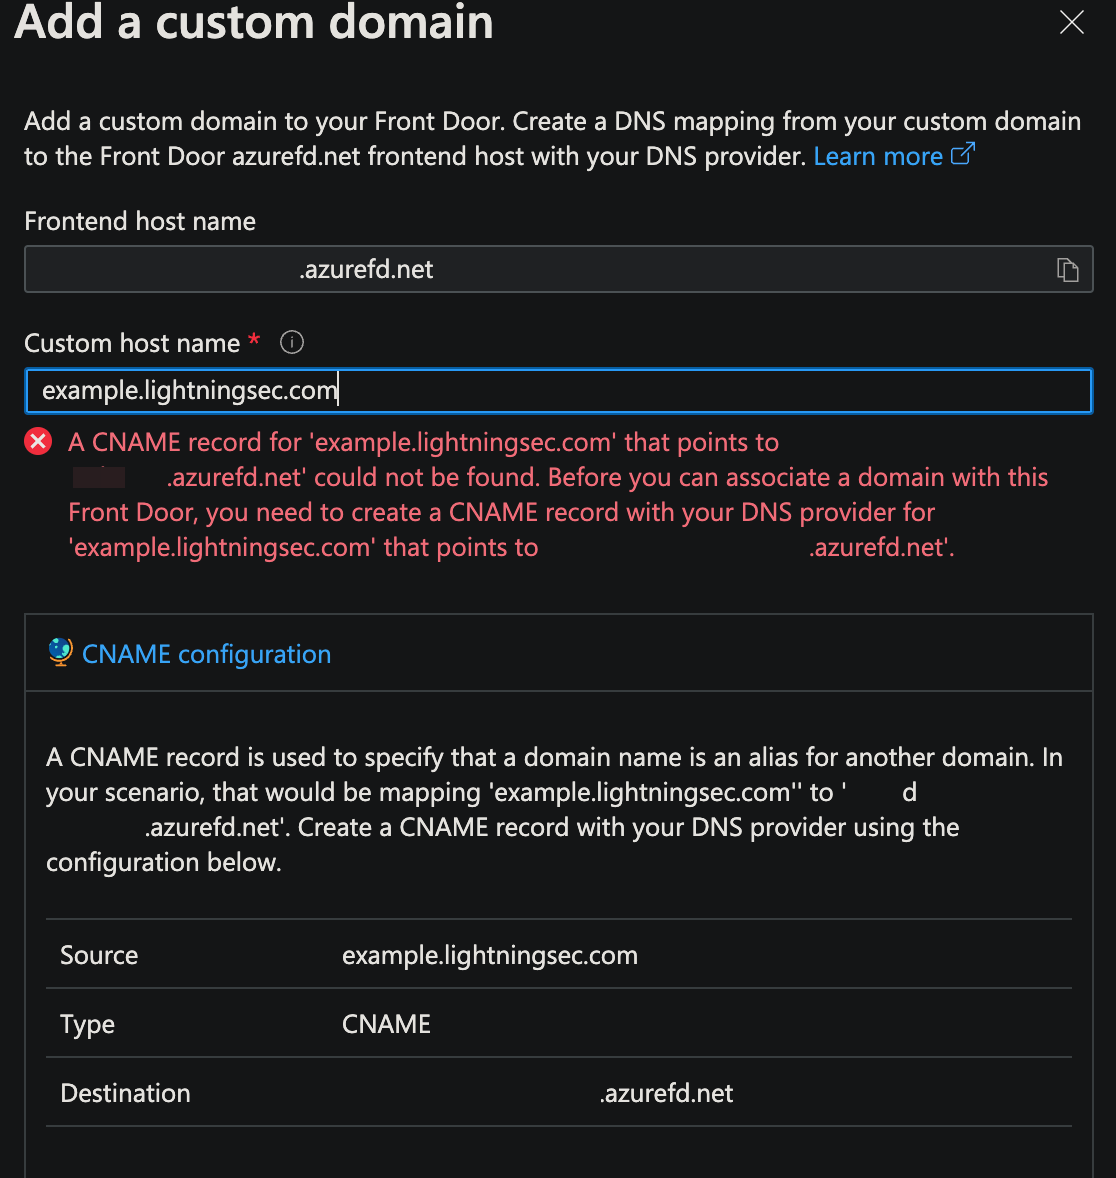
To get started adding your custom domains, hit the + on frontends/domains and add your first custom domain -
-
As you can see, this is where we need to add in DNS records. Navigate to the corresponding DNS zone in your DNS provider and create the CNAME record pointing from your custom domain to your Azure Front Door host name. In my case, this had to be done in both on-premises Active Directory DNS & in Azure DNS.
-
Once Azure detects the CNAME record, it will allow you to save the frontend configuration.
-
Once saved, go to the routing rule you created previously. In the frontends/domains drop down, you should now see your custom domain.
-
Unselect the Azure Front Door hostname and select your custom domain.
-
Hit update & then make sure to hit Save on the Front Door designer.
-
Wait a few minutes for everything to propagate and you should now have a working URL redirect!
Now that you've done all the hard work creating & configuring Front Door, it is simple to add in new redirects whenever required.
